1 Overview
The Drop Box is a self-contained workshop tool for the Range Rover L460 and L461. It powers a removed door from an 18V Bosch battery pack via a TOBSUN TBC084013R8C138Z DC-DC buck-boost converter, maintaining a fixed 13.8V output across an input range of 8–40V. The door's factory window motor and switch operate exactly as on the vehicle.
The Bosch battery slides directly onto two Heschen 4.8mm male spade terminals at the base of the Body. The 13.8V output connects via two Heschen 2.8mm male spade terminals inside the Plug, which plug directly onto the car's door harness connector. A toggle switch controls power; a green LED confirms the output is live.
Supported function
| Function | Notes |
|---|---|
| Power window | Up / down operation via the original factory door switch |
2 Parts List — Bill of Materials
2.1 Electrical components
| Ref | Description | Qty | Specification |
|---|---|---|---|
| BAT1 | Bosch 18V battery pack | 1 | Any Bosch 18V Professional series |
| U1 | TOBSUN TBC084013R8C138Z DC-DC converter | 1 | Input 8–40V, output fixed 13.8V / 10A max (138W) — screw terminals, aluminium body |
| SW1 | Toggle switch, SPST | 1 | 20A rated — fits circular Body side cutout |
| LED1 | Green LED, 5mm | 1 | 3V forward voltage |
| R1 | Resistor, 1kΩ | 1 | LED current limiter, in series with LED |
| F1 | Inline blade fuse holder | 1 | Waterproof, on +18V cable between battery and switch |
| F2 | Blade fuse, 15A | 2 | 1 fitted + 1 spare |
2.2 Crimp terminals
| Ref | Description | Qty | Used for |
|---|---|---|---|
| SP1 | Heschen male spade crimp terminal, 4.8mm | 2 | Battery connection — 4.8mm tabs at Body base, Bosch battery slides directly onto these |
| SP2 | Heschen male spade crimp terminal, 2.8mm | 2 | Output connection — 2.8mm tabs inside Plug, plug directly onto car door harness connector |
2.3 TOBSUN converter — terminal & wire reference
The TOBSUN uses four screw terminals. Wire colours on the flying leads are:
| Terminal | Wire colour | Connection |
|---|---|---|
| ⊕ Input | Red | From toggle switch output (switched 18V) |
| ⊖ Input | Black | Ground rail (battery −) |
| ⊖ Output | Black | Ground rail (common GND) |
| ⊕ Output | Yellow | To 2.8mm spade terminal + inside Plug (13.8V) |
2.4 3D printed parts & fixings
| Ref | Description | Qty | Specification |
|---|---|---|---|
| — | Body (Drop_Box_Body) | 1 | 92 × 113 × 145 mm — PETG or ABS |
| — | Cover (Drop_Box_Cover) | 1 | 109 × 75 × 168 mm — PETG or ABS |
| — | Plug (Drop_box_plug) | 1 | 115 × 90 × 20 mm — PETG or ABS |
| INS1 | M3 heat-press brass insert (3M) | 10 | 4 in Cover · 4 in Plug · 2 in Body (converter bosses) |
| SCR1 | M3 × 10mm cap head, S/S | 4 | Cover → Body front face |
| SCR2 | M3 × 8mm cap head, S/S | 4 | Plug → Body base |
| SCR3 | M3 × 6mm cap head, S/S | 2 | TOBSUN → Body internal bosses |
2.5 Cable & sundries
| Ref | Description | Qty | Specification |
|---|---|---|---|
| W1 | Automotive cable, red, 2.5mm² | 1m | Battery + → fuse → switch → TOBSUN ⊕ Input |
| W2 | Automotive cable, black, 2.5mm² | 1m | Battery − → TOBSUN ⊖ Input and ⊖ Output (GND) |
| W3 | Automotive cable, yellow, 1.0mm² | 0.5m | TOBSUN ⊕ Output → 2.8mm spade in Plug |
| W4 | Heat-shrink tubing assortment | 1pk | All joins and terminals |
| W5 | Wire labels / markers | 1pk | Label all wires at both ends |
3 3D Printed Enclosure
Three-part custom design supplied in STL and STEP format. The TOBSUN converter mounts inside the Body on two integral bosses. The Plug houses the two 2.8mm output spades that connect directly to the door harness.
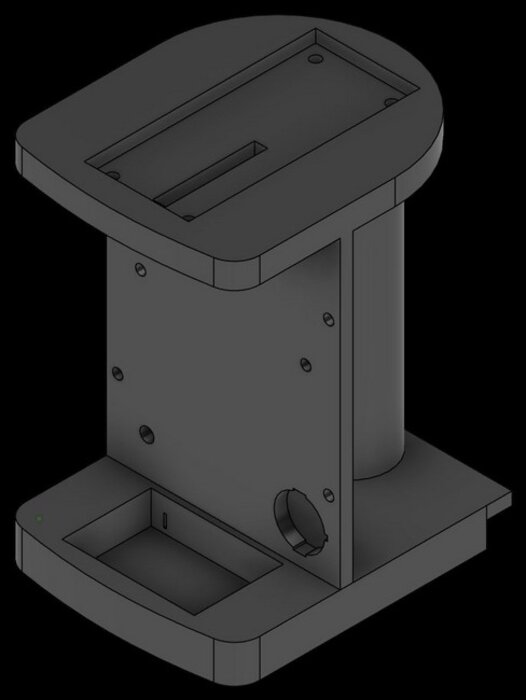
4.8mm spades · 2 inserts
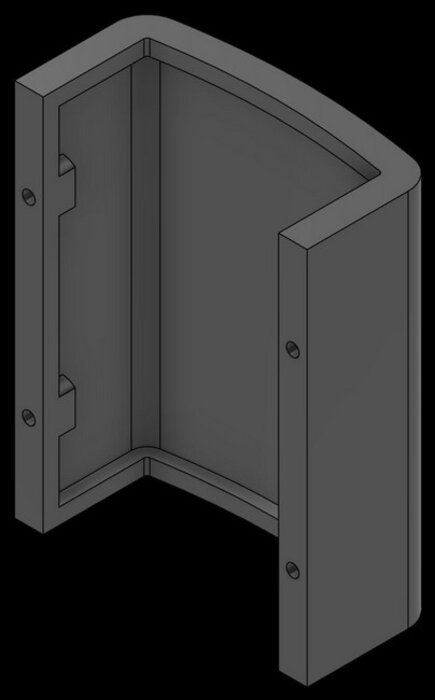
L-shaped · 4 inserts
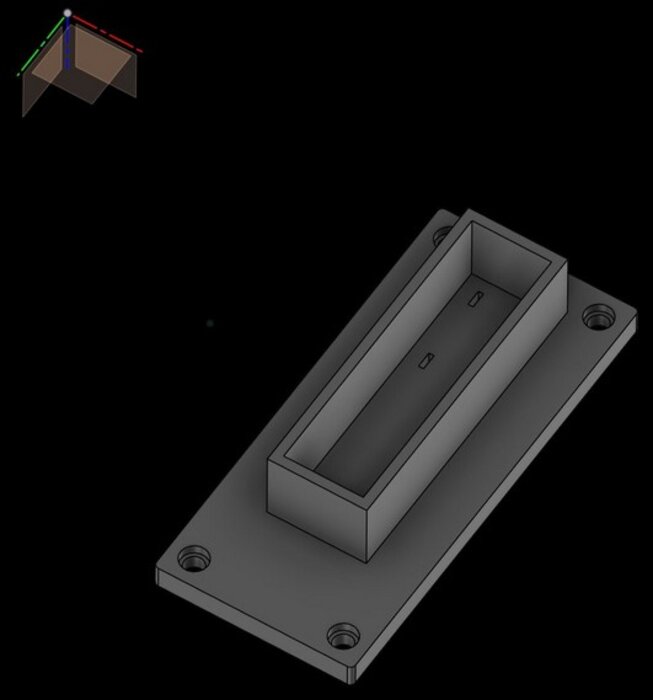
2.8mm spades · 4 inserts
3.1 Part descriptions
Body — Main upright shell. Two 4.8mm spade terminals at the base accept the Bosch battery directly. Circular side cutout for the toggle switch. Two internal bosses carry M3 inserts for the converter mount. Front face is open, closed by the Cover.
Cover — L-shaped front panel. Contains 4 heat-press inserts; M3 × 10mm screws pass through clearance holes in the Body front face and thread into these inserts.
Plug — Flat base plate with raised rectangular connector housing containing the two 2.8mm output spade terminals. Plugs directly onto the car door harness connector. Contains 4 heat-press inserts at corners; M3 × 8mm screws pass through the Body base into these inserts.
3.2 Heat-press insert locations
| Part | Count | Mating screw | Function |
|---|---|---|---|
| Cover | 4 | M3 × 10mm through Body front face | Secures Cover to Body |
| Plug | 4 | M3 × 8mm through Body base | Secures Plug to Body |
| Body (internal) | 2 | M3 × 6mm direct | Mounts TOBSUN converter |
| Total | 10 | — | — |
3.3 Print settings
| Setting | Required value | Notes |
|---|---|---|
| Material | PETG or ABS | PLA not recommended — insufficient strength for this application |
| Layer height | 0.2mm | Do not increase — finer layers improve wall bonding |
| Wall count | 8 walls | Mandatory — ensures structural integrity and insert retention |
| Infill | 40% | Grid or gyroid — increased for rigidity |
| Supports | As required | Body interior overhangs will require support |
| Bed adhesion | Brim | Required for PETG and ABS |
| Orientation | As designed | Body upright; Plug flat on bed |
4 Wiring
Series circuit: 18V battery → inline fuse → toggle switch → TOBSUN TBC084013R8C138Z → 2.8mm spades in Plug → car door harness. Output is fixed at 13.8V across the full 8–40V input range — no adjustment required.
Wire colour summary: Red = ⊕ Input, Black = ⊖ GND (input and output), Yellow = ⊕ Output 13.8V.
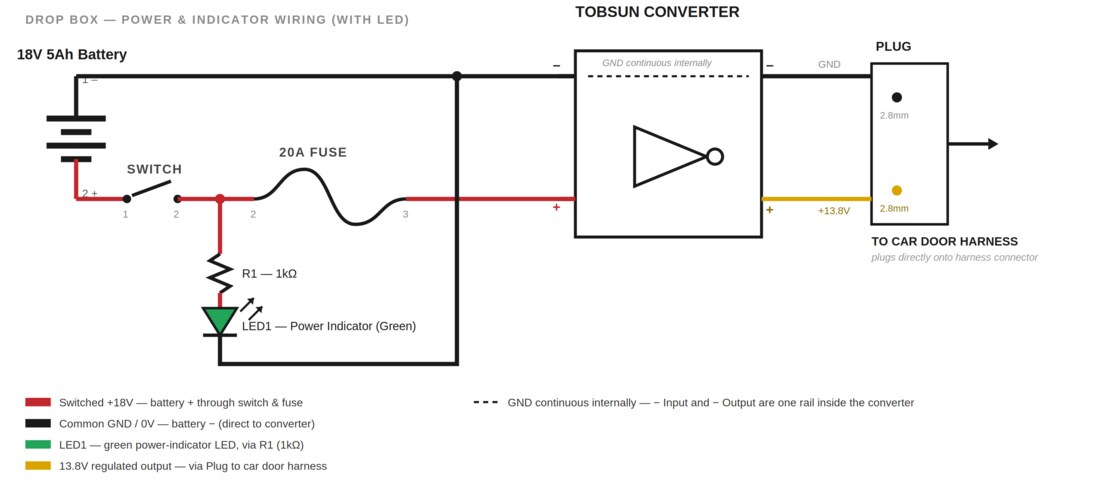
Fig. 4.1 — Power & indicator wiring, including LED1 power-indicator LED and R1 current-limiting resistor
| Connection | Wire | Colour | Notes |
|---|---|---|---|
| Battery + spade → fuse → switch input | W1 | Red 2.5mm² | Inline fuse external on cable |
| Switch output → TOBSUN ⊕ Input | W1 | Red 2.5mm² | Switched 18V |
| Battery − spade → TOBSUN ⊖ Input + ⊖ Output | W2 | Black 2.5mm² | Common GND rail |
| TOBSUN ⊕ Output → 2.8mm spade in Plug | W3 | Yellow 1.0mm² | 13.8V output |
| Switch output spur → R1 → LED anode | — | Any | 1kΩ resistor in series |
| LED cathode → GND rail | — | Black | Common GND |
5 Assembly Instructions
Print Body (upright), Cover, and Plug (flat on bed) to the settings in Section 3.3. 8 walls required on all parts. Remove supports, clean stringing, dry-fit all three before proceeding.
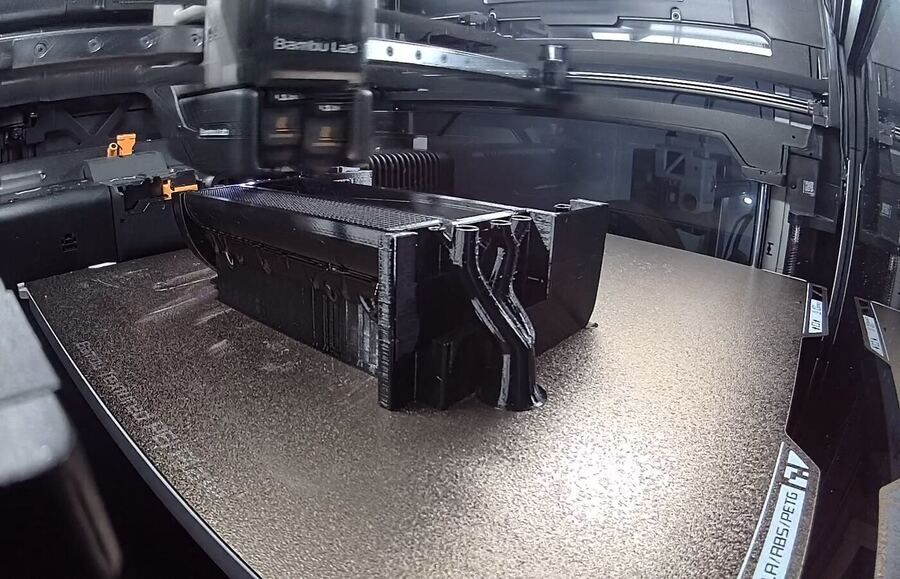
Body mid-print on the Bambu Lab printer
Press 4 M3 heat-press inserts into the Cover's Ø5.5mm bores (~220°C PETG). Squarely until flush. 60 seconds to cool. These receive M3 × 10mm screws through the Body front face.
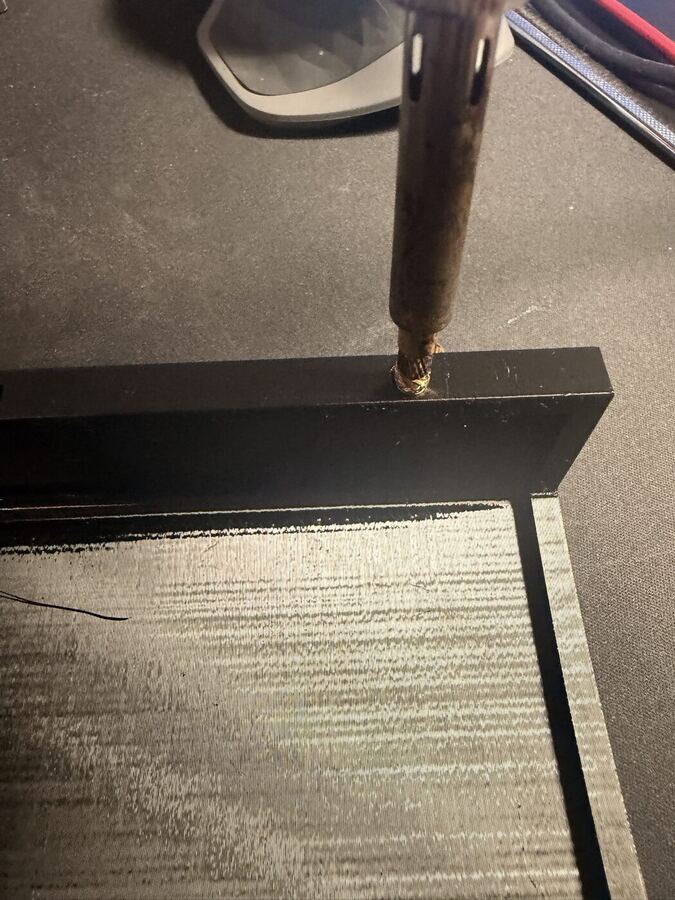
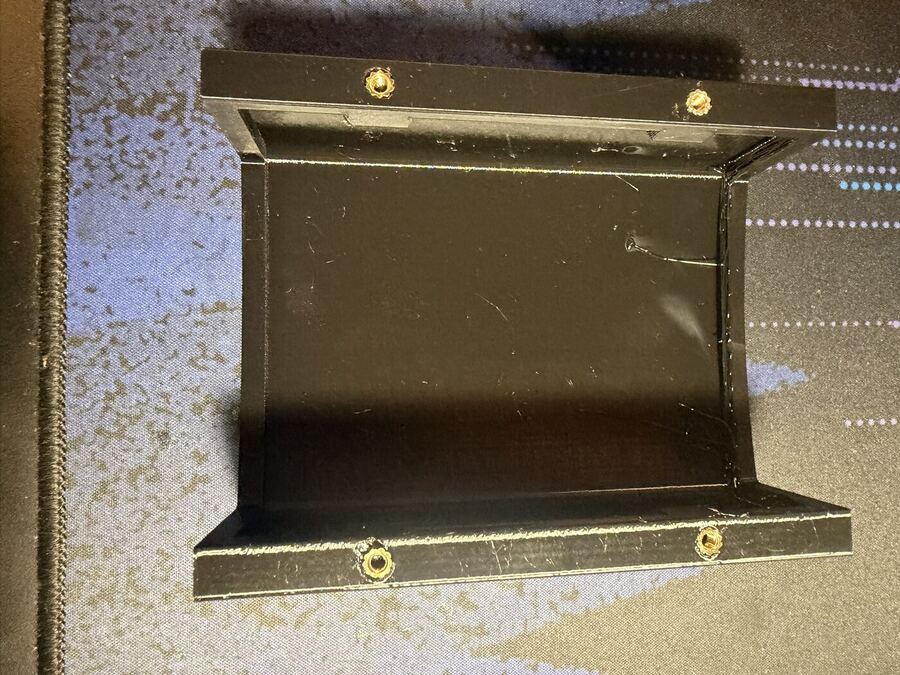
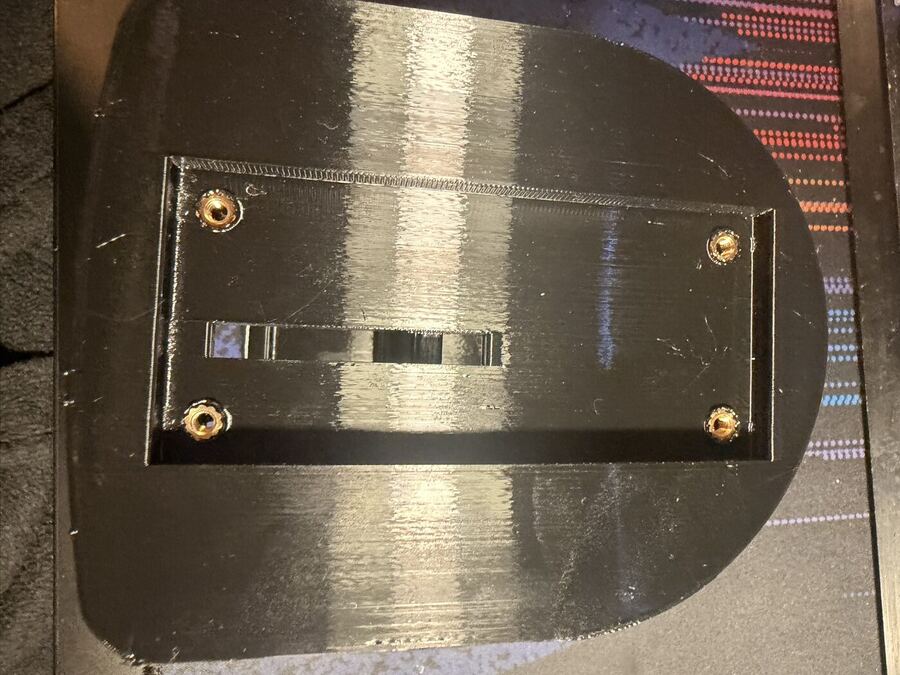
Press 4 inserts into the Plug's 4 corner Ø5.5mm bores. These receive M3 × 8mm screws through the Body base.
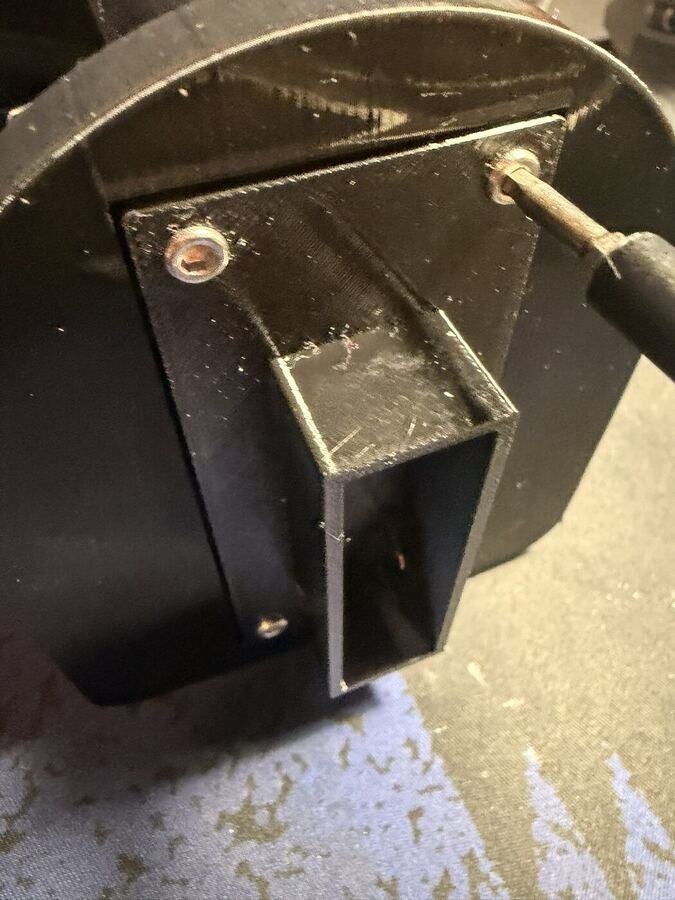
Press the remaining 2 inserts into the Body's internal converter boss bores. These receive M3 × 6mm screws to mount the TOBSUN directly.
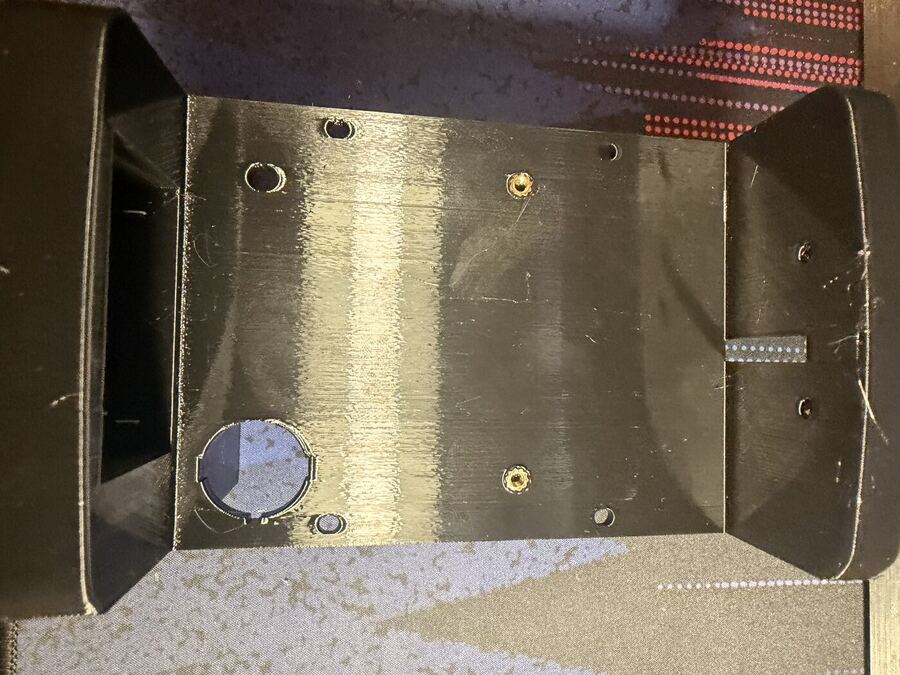
Body interior showing the 2 converter-mount inserts
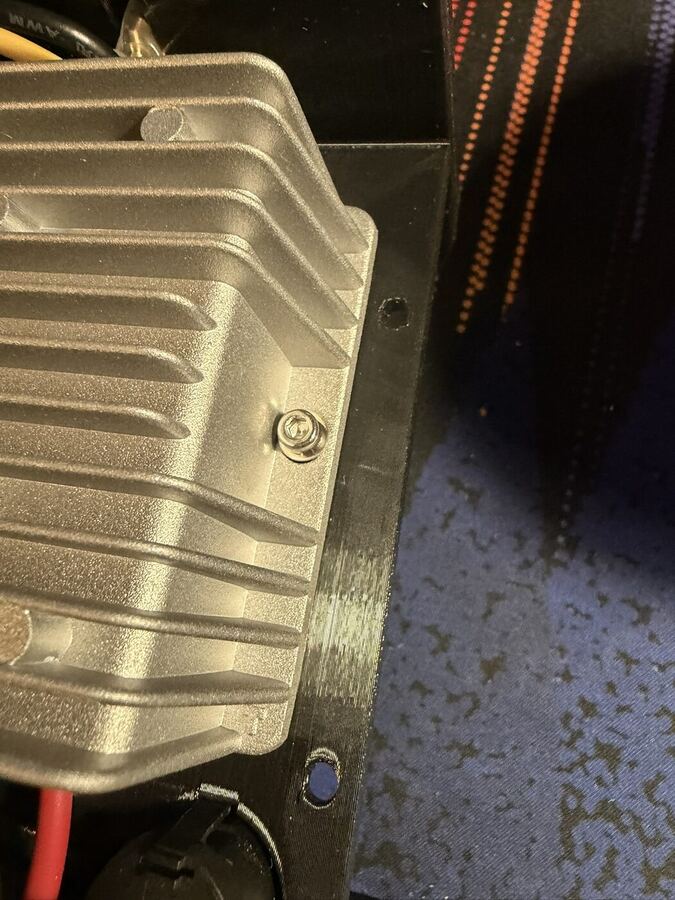
Fix the TOBSUN TBC084013R8C138Z to the two Body bosses using 2× M3 × 6mm screws. Orient with screw terminals accessible for wiring.
Insert the toggle switch into the circular Body side cutout and secure with its locking nut.
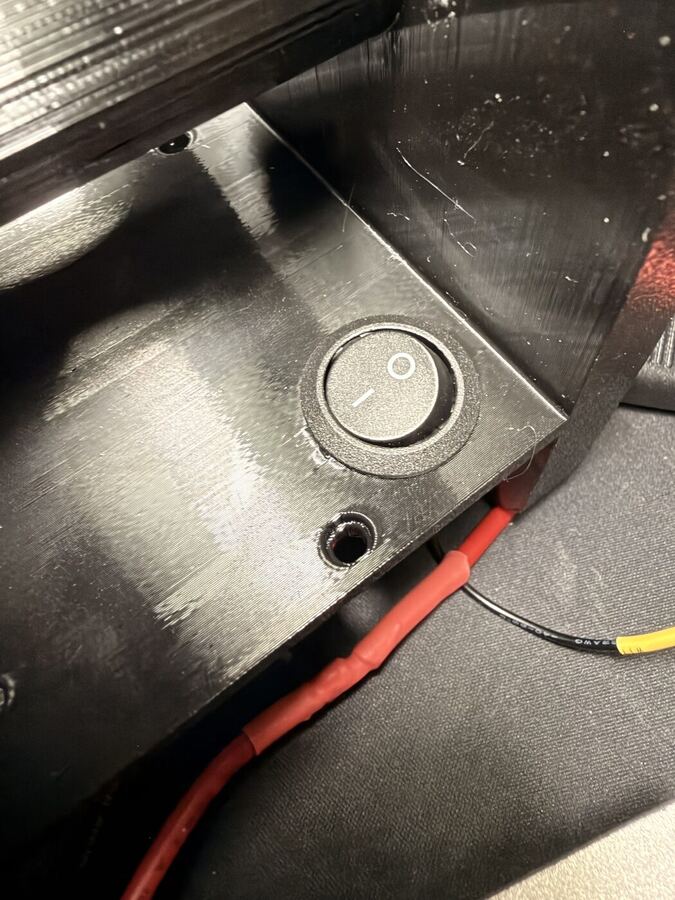
Crimp Heschen 4.8mm spades onto the 2.5mm² red (+) and black (−) cables. Mount at Body base in correct +/− orientation. Test-fit the Bosch battery to confirm polarity and engagement before proceeding.
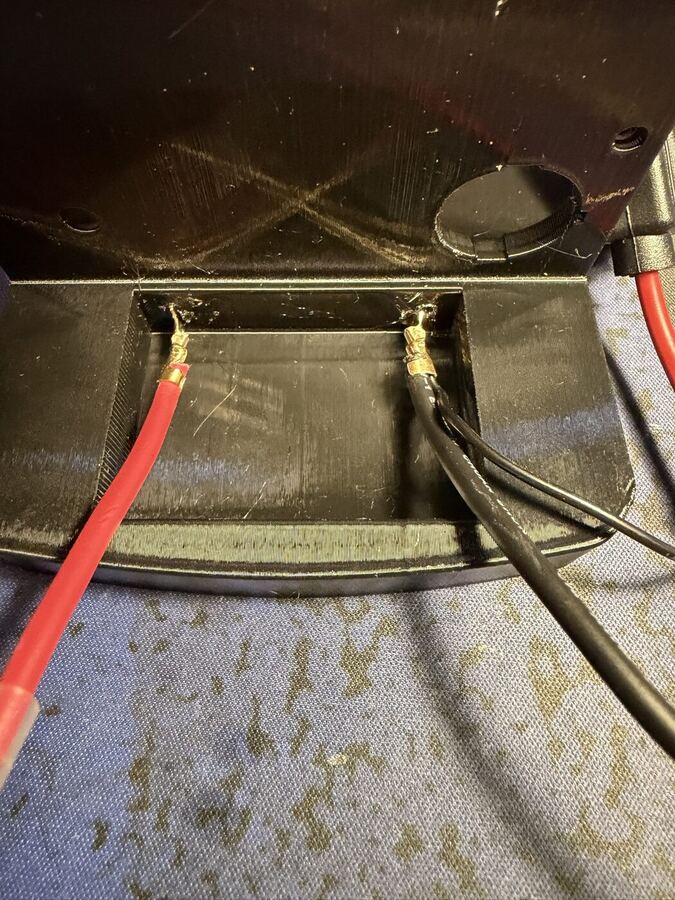
Crimp Heschen 2.8mm spades onto the output wires: yellow (TOBSUN ⊕ Output, 13.8V) and black (GND). Position inside the Plug housing in the correct +/− orientation to mate with the car harness.
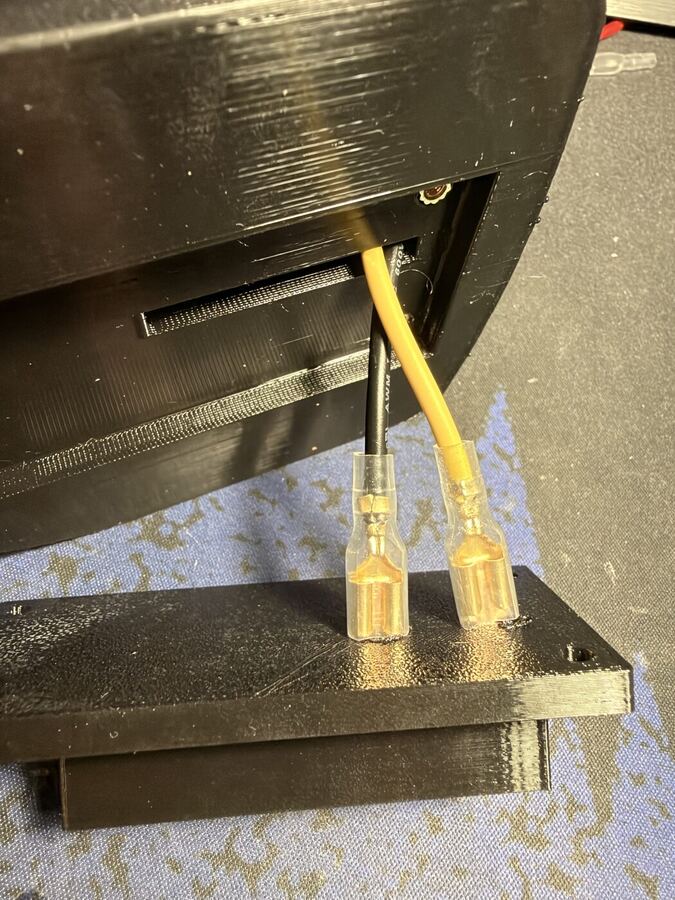
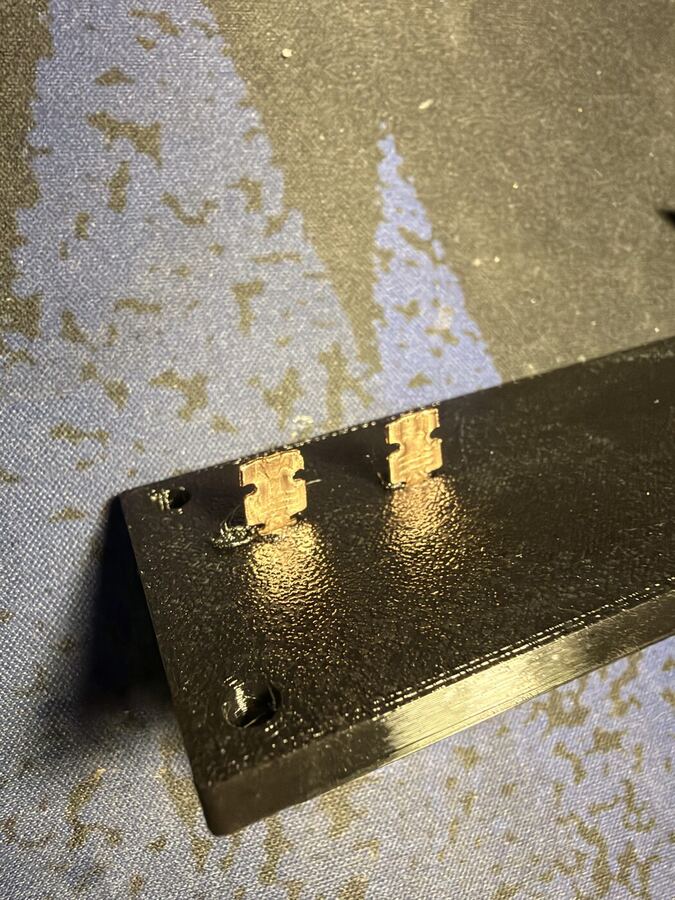
Run 2.5mm² red: + battery spade → inline fuse (external) → into Body → switch input. From switch output connect to TOBSUN ⊕ Input screw terminal. Run 2.5mm² black from − battery spade to TOBSUN ⊖ Input and ⊖ Output terminals (common GND). Run yellow 1.0mm² from TOBSUN ⊕ Output to + 2.8mm spade in Plug. Wire spur from switched + through R1 (1kΩ) to LED anode; LED cathode to GND rail.
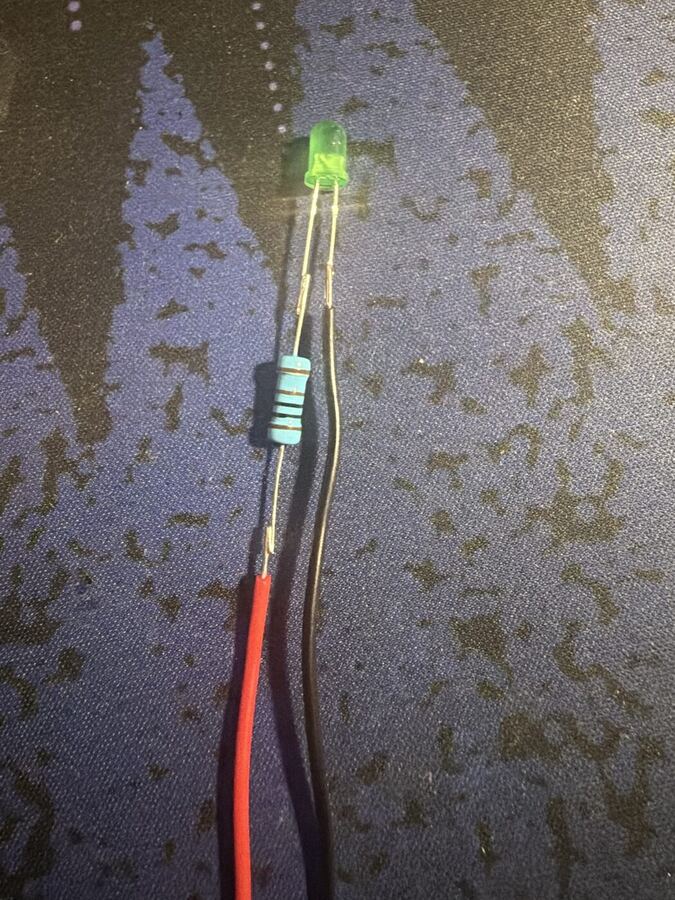
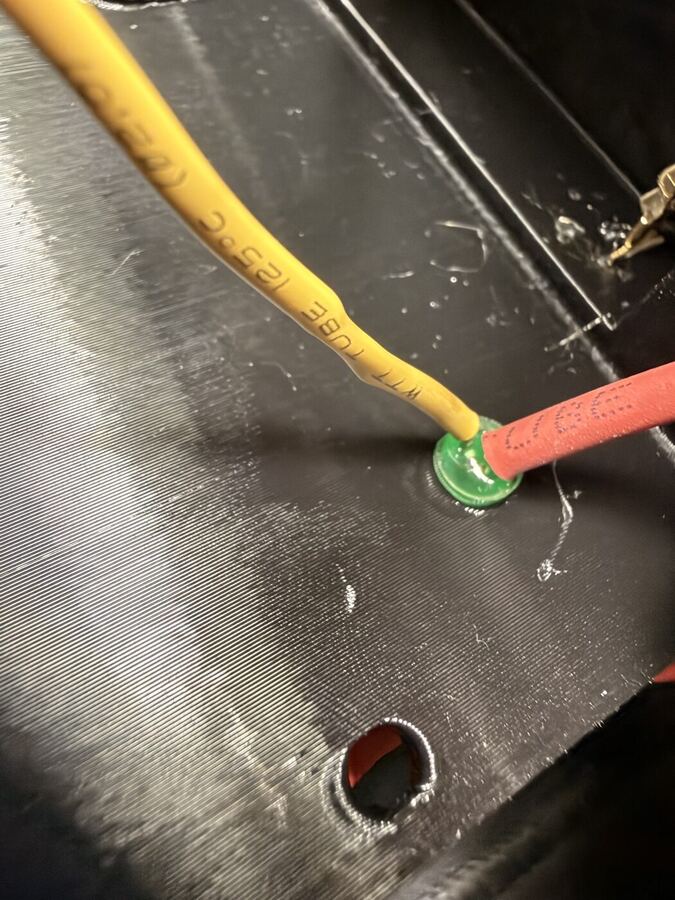
Insert 15A fuse. Slide Bosch battery onto base spades and switch on — LED should illuminate. Measure across the two 2.8mm spades in the Plug: expected 13.8V DC. TOBSUN output is factory-fixed — no adjustment needed. Switch off and remove battery before continuing.
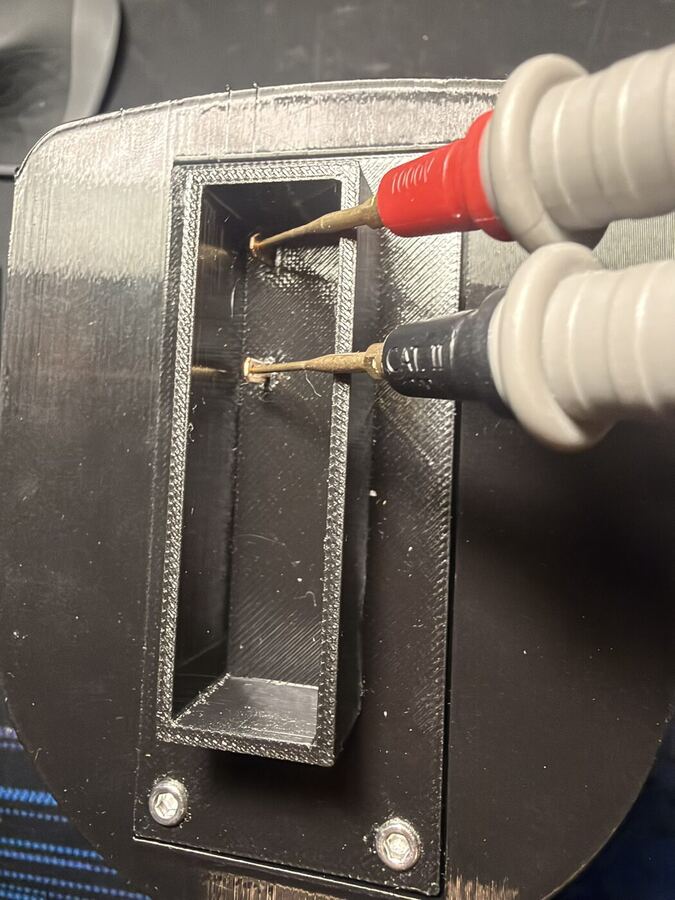
Battery removed: confirm no short between +V and GND across the 2.8mm spades.
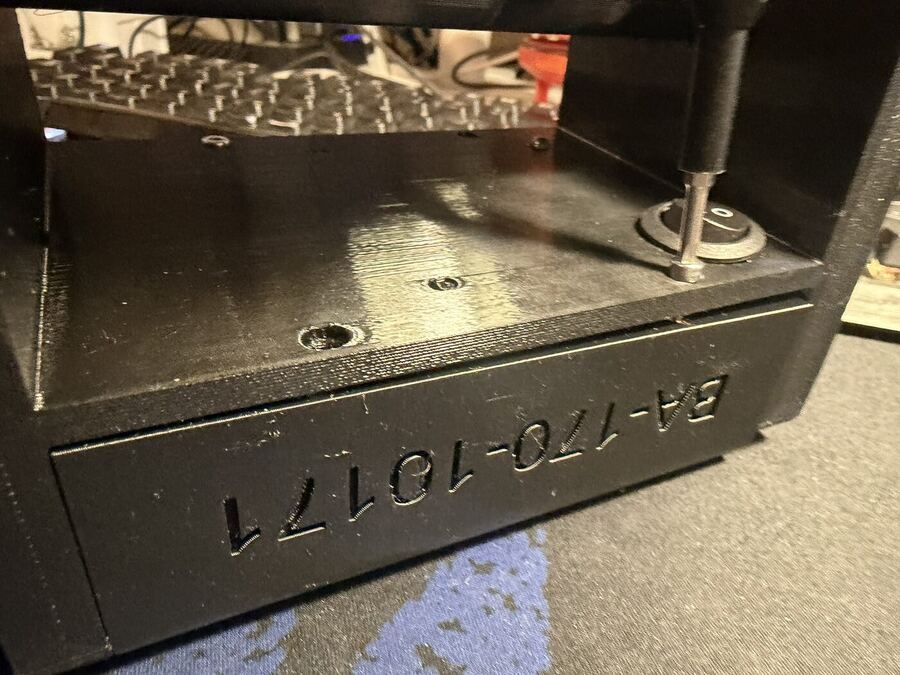
Cover: 4× M3 × 10mm screws through Body front face into Cover inserts. Plug: 4× M3 × 8mm screws through Body base into Plug inserts. Finger tight plus a quarter turn. Label switch ON/OFF and LED 'POWER'.
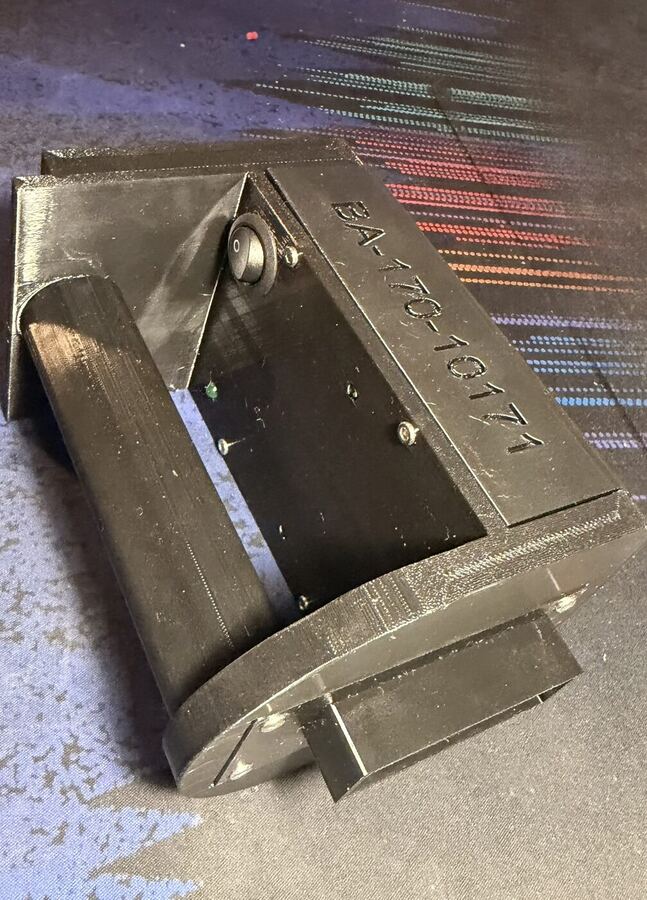
Finished Drop Box — Cover attached, switch and GSPAS ID visible
6 Quick Reference
Component summary
| Component | Value / setting | Notes |
|---|---|---|
| Bosch 18V battery | 18V DC input | Slides onto 4.8mm spades at Body base |
| 4.8mm spade terminals | Heschen male, 4.8mm ×2 | Body base — battery connection |
| 2.8mm spade terminals | Heschen male, 2.8mm ×2 | Inside Plug — direct to car door harness |
| TOBSUN TBC084013R8C138Z | Input 8–40V → 13.8V fixed | 10A / 138W — no adjustment required |
| Inline fuse | 15A blade | External on +18V cable |
| Toggle switch | SPST, 20A | Circular cutout — Body side |
| Green LED + R1 | 5mm + 1kΩ | Switched power indicator |
| Brass inserts | M3 heat-press, 3M | 4 × Cover · 4 × Plug · 2 × Body = 10 total |
| Screws | M3 S/S cap head | 10mm → Cover · 8mm → Plug · 6mm → converter |
Fault finding
| Symptom | Likely cause | Action |
|---|---|---|
| LED off, nothing works | Fuse blown / flat battery | Check 15A fuse and battery charge |
| Battery won't engage | Spade polarity reversed | Swap 4.8mm spades and retest |
| Output reads 0V | Wiring error at screw terminals | Re-check TOBSUN terminal connections |
| Output low (<13.8V) | Battery too discharged (<8V input) | Charge Bosch battery — min input 8V |
| Window unresponsive | 2.8mm spades misaligned or loose | Re-check spade fit to harness connector |
| Window slow / stalling | Battery low or current limit | Check battery charge — max output 10A |
| Converter warm to touch | Normal — aluminium body is heatsink | Ensure airflow clearance inside Body |
| Insert pulling out | Insufficient wall count | Reprint at 8 walls minimum |